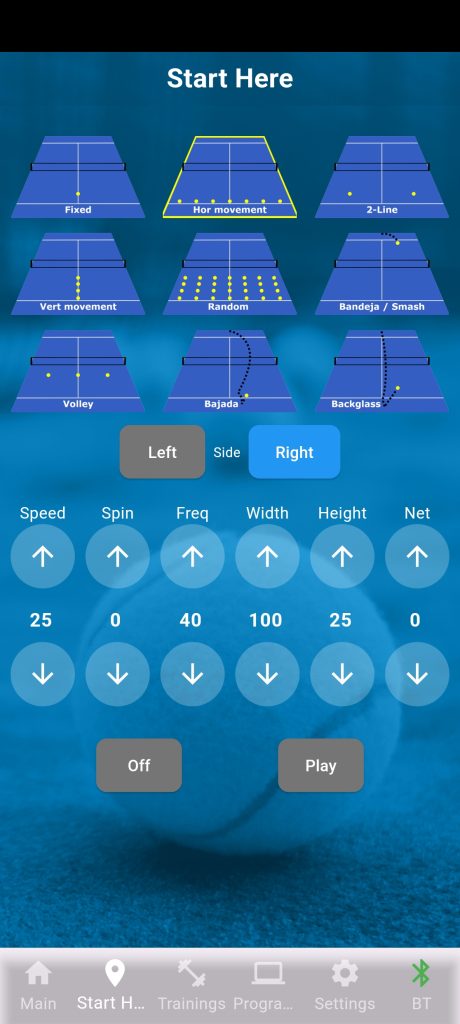
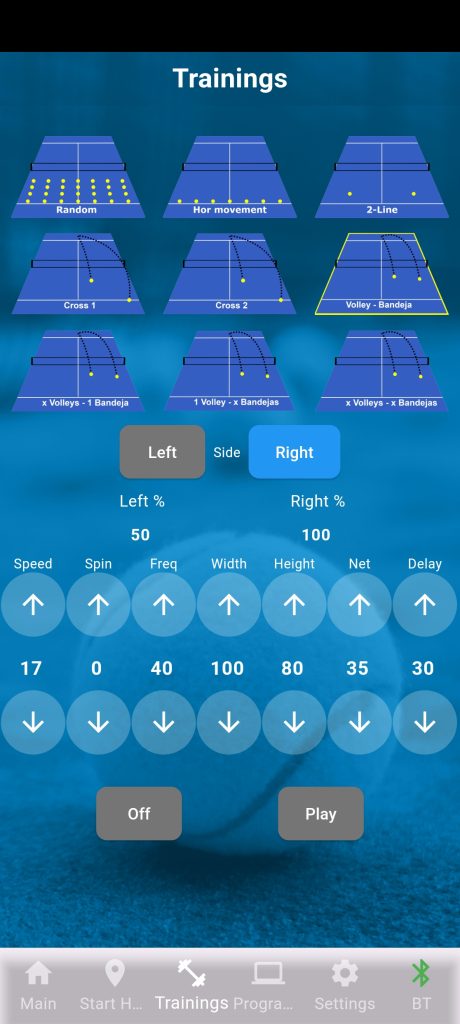
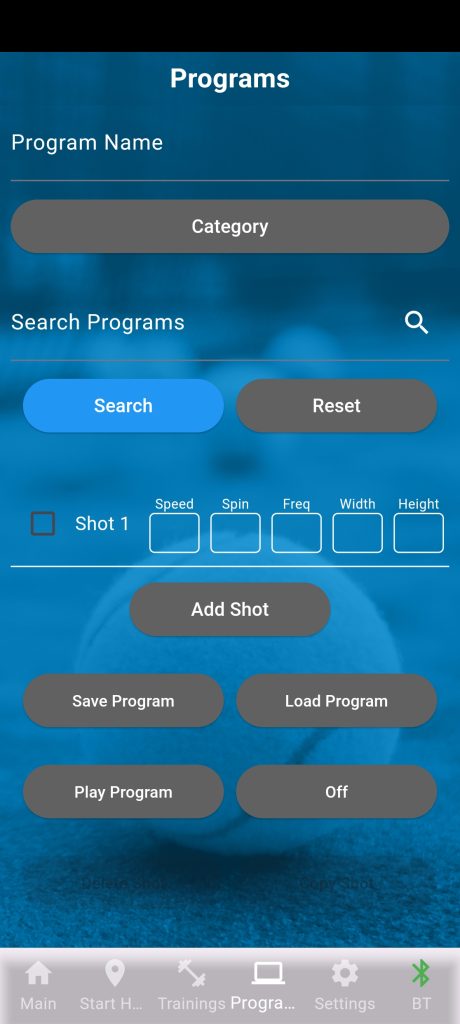
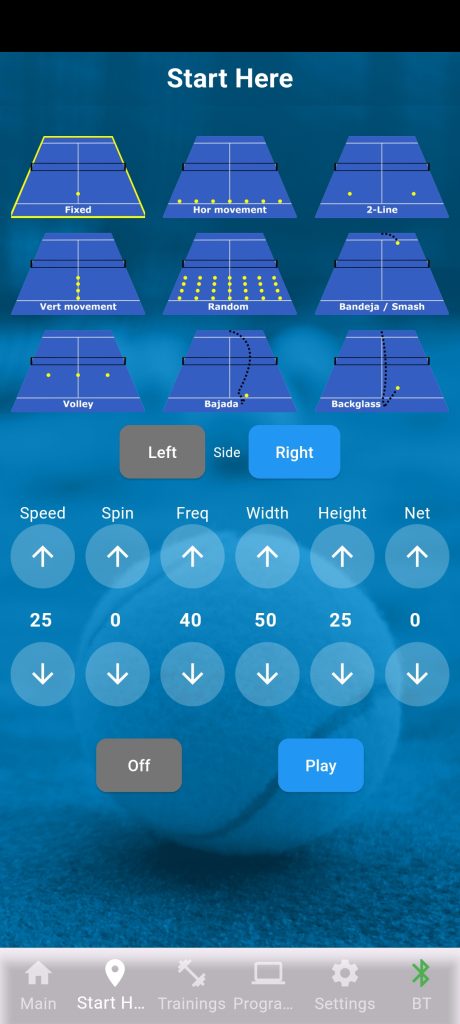
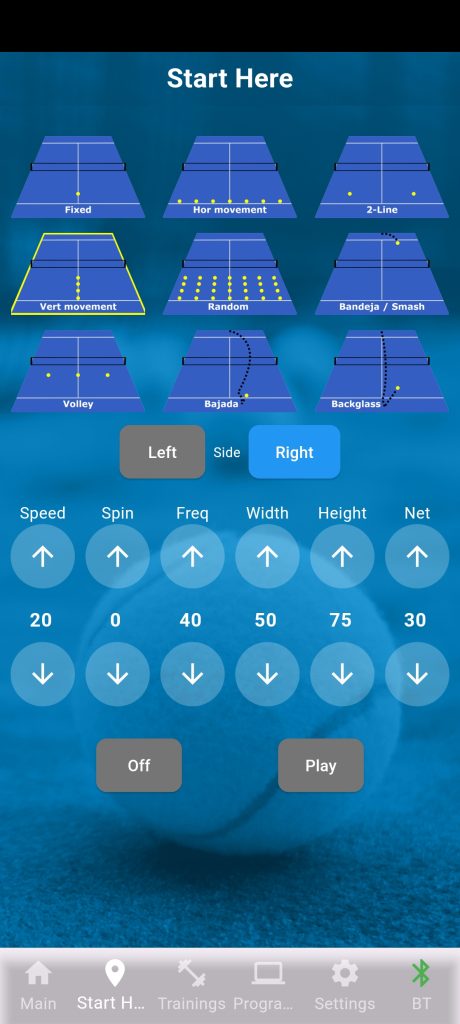
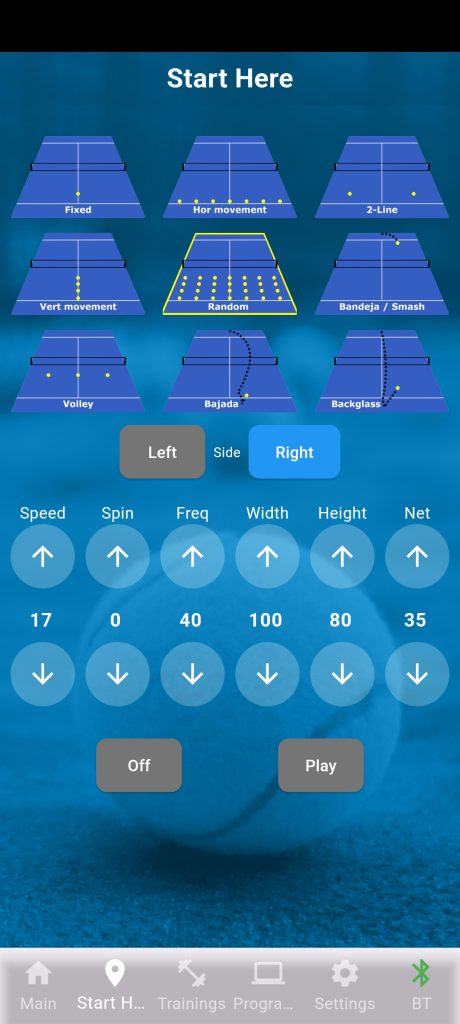
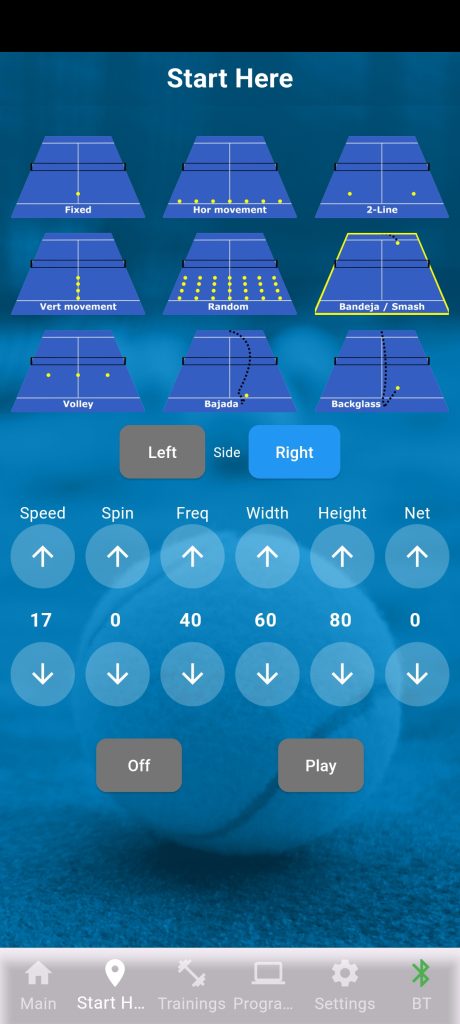
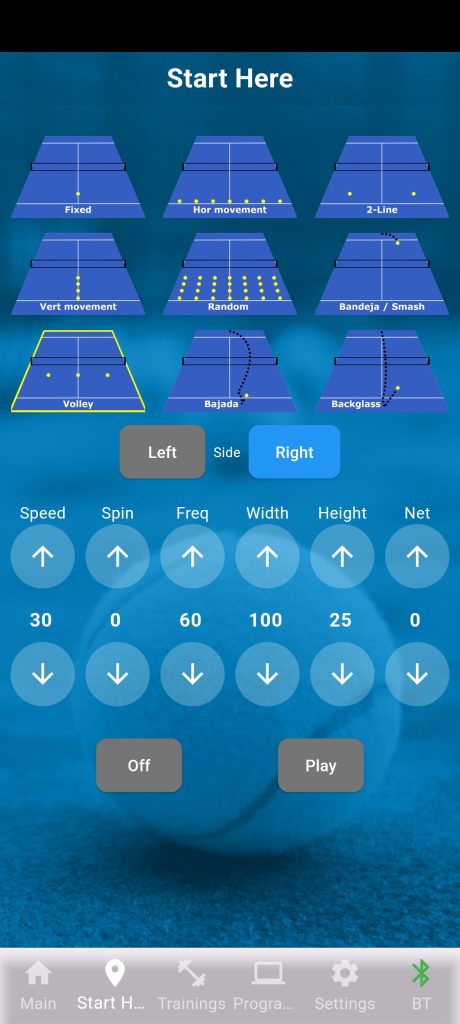
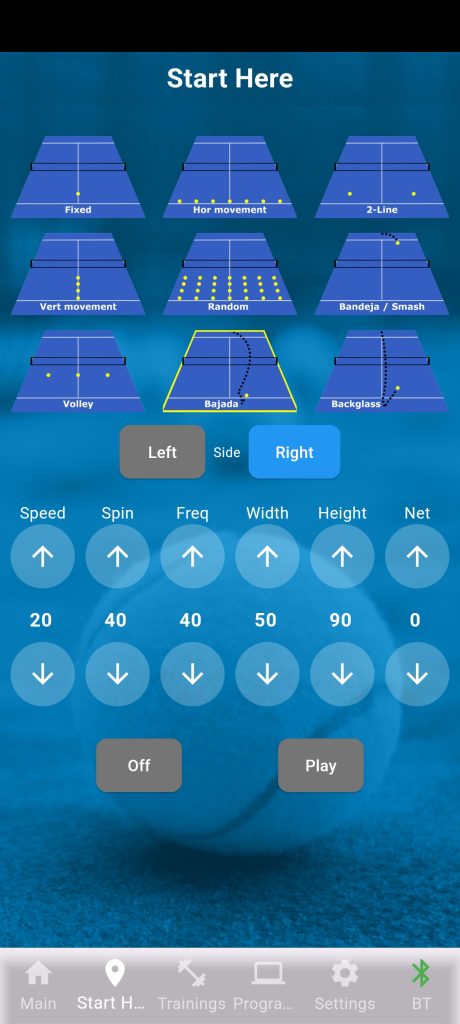
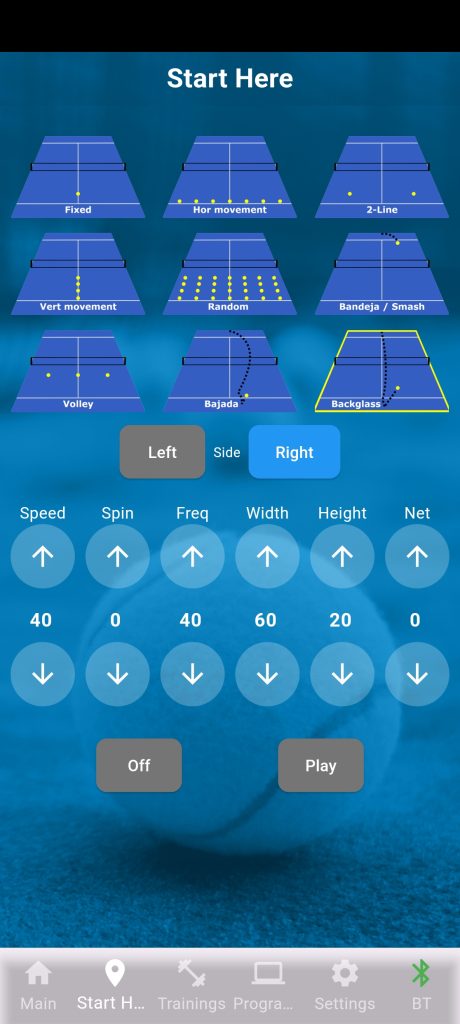
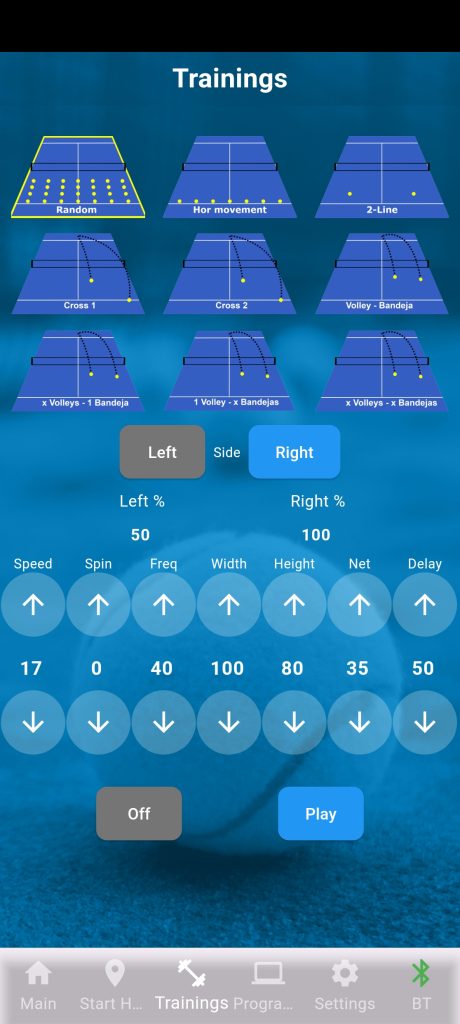
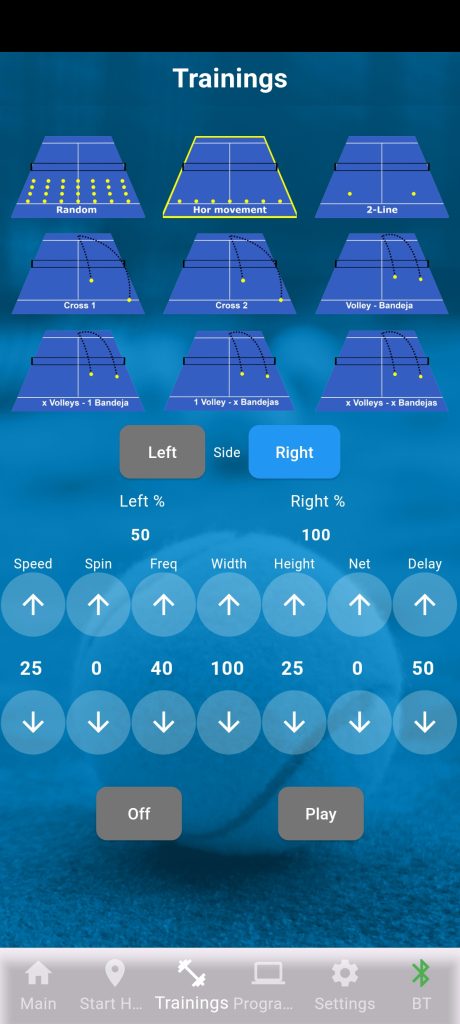
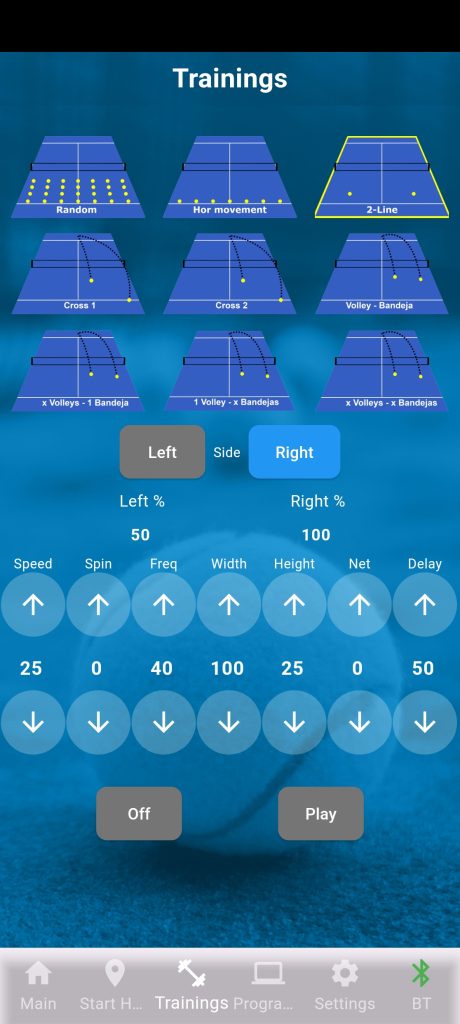
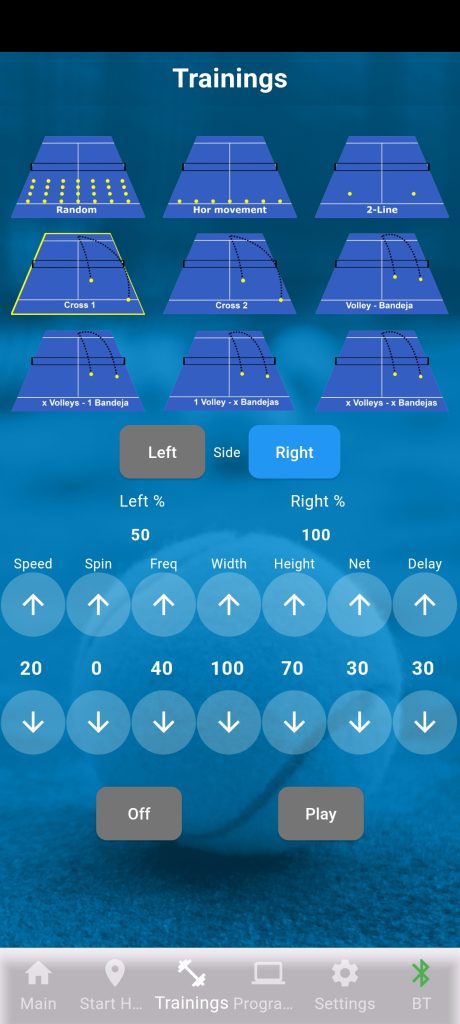
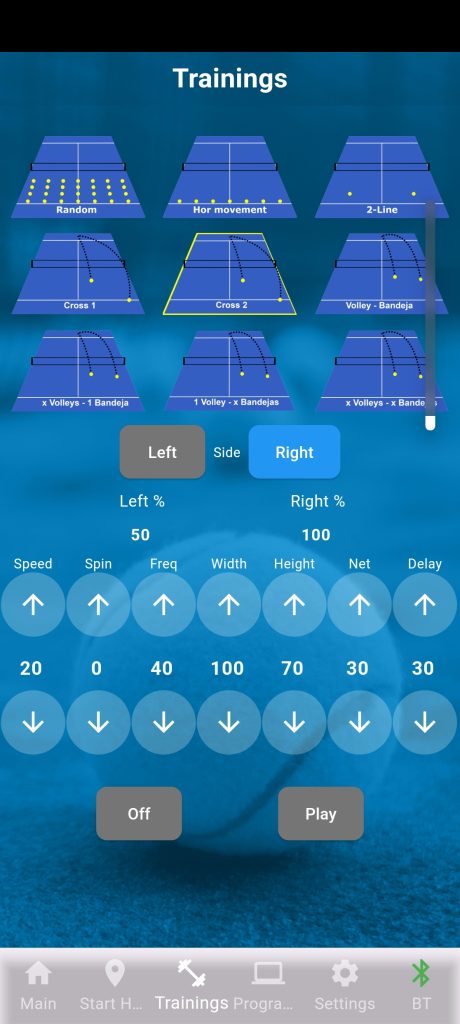
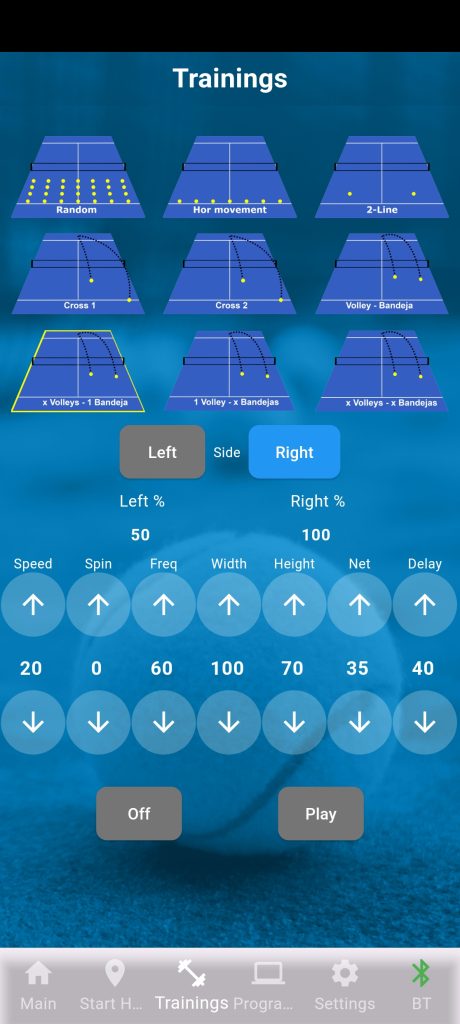
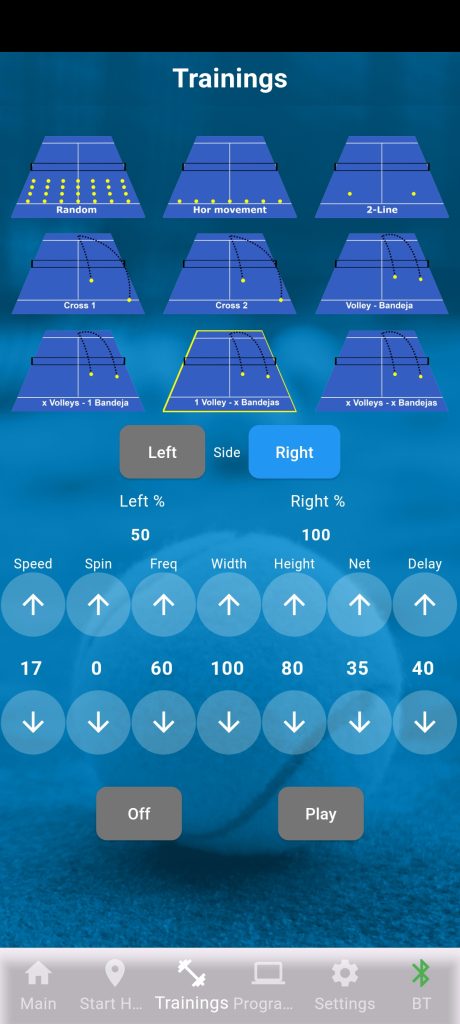
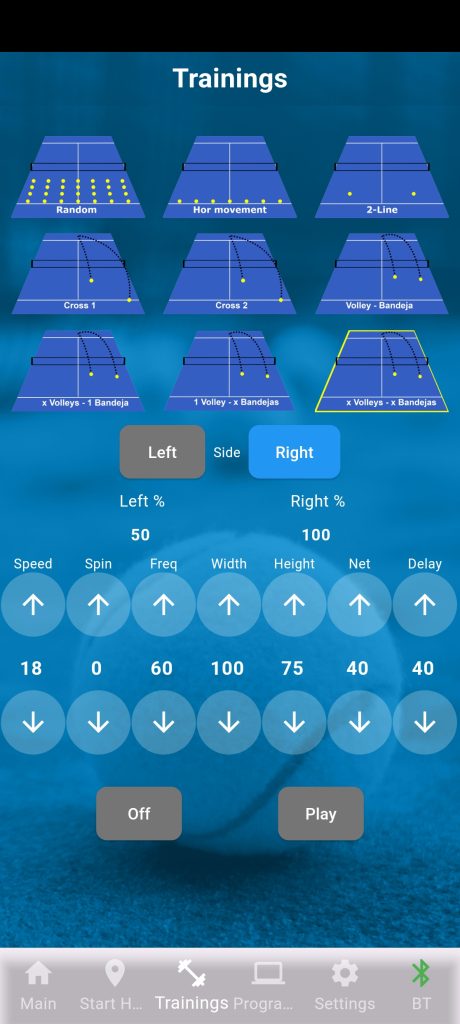
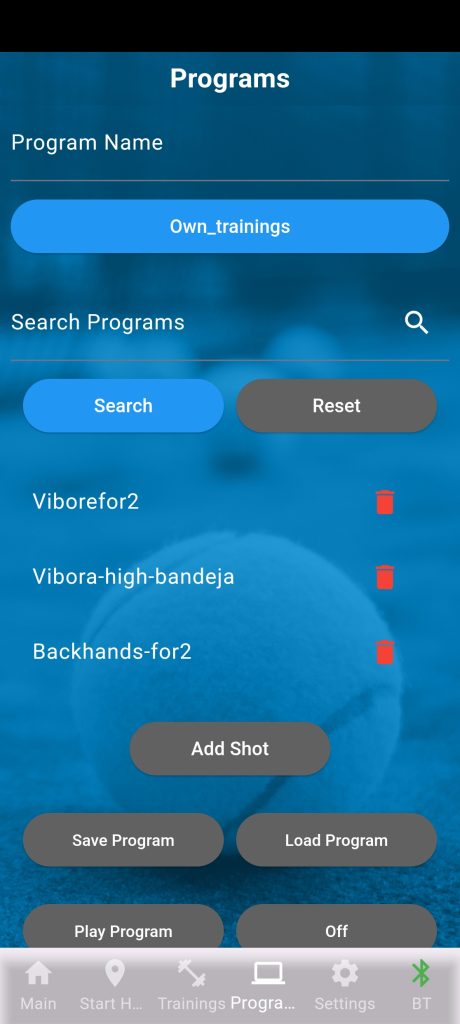
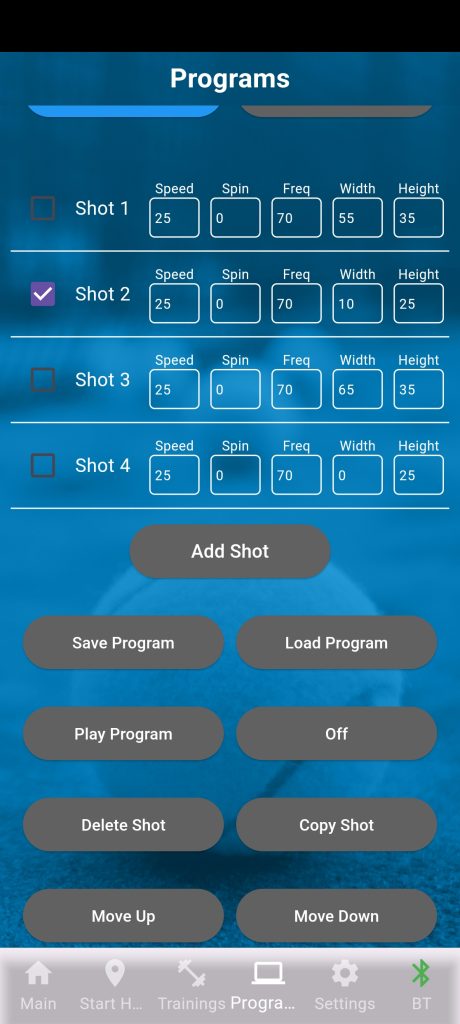

App Overview

PadelShooter training app shot settings on a smartphone

Padelshooter: Quick Start Guide

1. Power Connection

  • Steps:
    1. Connect the battery to the Padelshooter using the cable.
    2. Turn the machine’s switch to DC mode.
  • Note:
    • Always use a fully charged battery for consistent performance.


2. Standard Positioning (2 Players)

  • Location:
    • Place the machine at the back of the courtclose to the backglass.
    • Position it in the horizontal middle of the court (aligned with the center line).
  • Alignment:
    • Ensure the machine points toward the middle line of the court.
    • Calibrate Method:
      1. Select Fixed training. Set Left and Right sides, Width = 50

        OR
      2. Use the Middle button (Settings screen) to check if the ball bounces near the center line.

3. Alternative Positions (1 Player)

  • Corner Placement:
    • Place the machine in the corner of the court.
    • Angle it toward the opposite skew corner (diagonal targeting).
  • Purpose:
    • Trains corner shots with realistic rebounds:
      • Balls may bounce off the backglass first or sideglass first.
    • Simulates real-match scenarios where players often defend from corners.
  • Full Left or Right side positioning:
    • Place the machine in the middle of the court (the standard position for 2 players, described earlier)
    • In Settings screen, press Left or Right positioning button for the side you want to train
    • Angle it so that the ball bounces on the middle line
    • Now the Padelshooter is using the whole Left or Right side (also the side walls)

4. Key Adjustments for Different Setups

ScenarioMachine PositionTraining Benefit
Standard (2 players)Center-backBalanced drills for doubles
Corner (1 player)Skewed diagonalRealistic defensive practice
Side-focused drillsOff-center (e.g., 70% Left)Targeted footwork training

5. Pro Tips for Optimal Use

  • For Corner Training:
    • Use Random or Hor Movement mode with Width = 70-100 for variability.
    • Combine with Spin to simulate unpredictable rebounds.
  • For Accuracy Testing:
    • Start with Fixed training + Width = 0 to verify machine alignment.
  • Safety:
    • Ensure the machine is stable and won’t move during operation.

Start Playing

1. Getting Started

  • Begin with “Start Here” Screen:
    • Use the preloaded trainings to familiarize yourself with basic settings.
    • Each training displays its last-used settings – adjust as needed.

2. Selecting Your Training

  • Choose a Training:
    • Press any training button (e.g., FixedRandomVolley-Bandeja).
    • The app shows the latest settings for that training. Modify if desired.

3. Setting Court Position

  • Select Side/Area:
    • Start Here Screen: Choose LeftRight, or Both sides.
    • Trainings Screen: Define precise zones with Left% and Right% (e.g., 30-70% for central drills).

4. Adjusting Ball Height

  • Variable Height Trainings (e.g., RandomVert Movement):
    • Net: Lowest ball position (e.g., volley height).
    • Height: Highest ball position (e.g., lob height).
  • Fixed Height Trainings:
    • Set Net = 0 and use Height to control trajectory.
  • Combination Drills (e.g., Volley-BandejaCross):
    • Net: Height of the low ball (volley).
    • Height: Height of the high ball (bandeja).

5. Configuring Horizontal Placement

  • Width Setting:
    • Width = 0: All shots at a fixed position (center or selected side).
    • Width > 0: Shots vary within the selected side/zone (higher = wider range).

6. Key Interactions Between Settings

ParameterEffectAdjustment Tip
SpeedHigher = deeper ballsReduce Height for same depth at higher speeds.
SpinTopspin (+) = shorter; Backspin (–) = deeperCombine with Speed for precision.
HeightHigher = loftier trajectoryLower for faster, flatter shots.

7. Pro Tips for Best Results

  • For consistency: Start with Width = 0 to master footwork before adding variability.
  • For depth control:
    • High speed + low height = deep, flat shots.
    • Low speed + high height = short, lob-like shots.
  • For spin: Use backspin (–) for defensive deep balls, topspin (+) for aggressive angles.

Example Workflow

  1. Select Volley-Bandeja training.
  2. Set Net = 30 (volley height), Height = 70 (bandeja height).
  3. Choose Width = 50 for moderate randomness.
  4. Adjust Speed = 25 and Spin = –10 for deep, slice-heavy bandejas.
  5. Press Play and focus on net transitions after each bandeja.

Troubleshooting Quick Checks

⚠ Ball too short/long? → Adjust Speed + Height inversely.
⚠ Inconsistent placement? → Verify Width and Side settings.
⚠ Spin not effective? → Use more extreme values (±30-50).


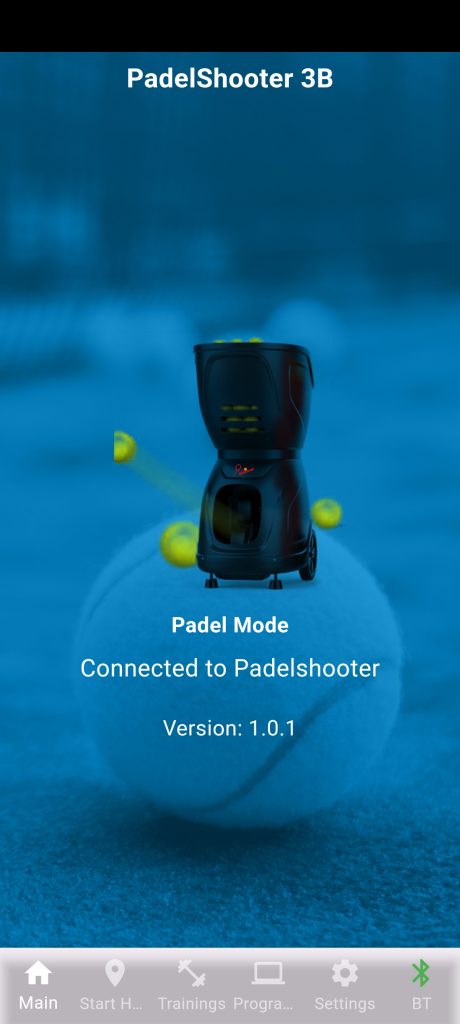
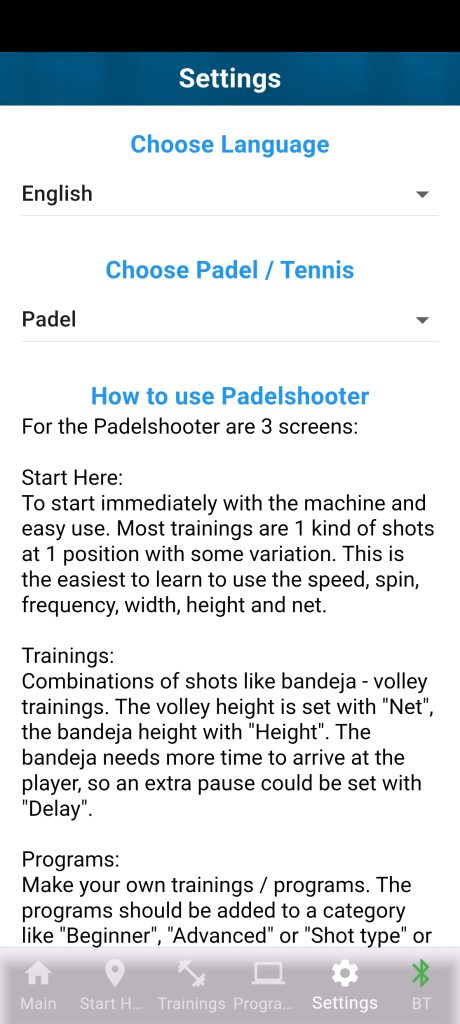
The Padelshooter General App features the following screens / functions for seamless training control:

  • Main Screen
    • View app version
    • Display your Padelshooter model name & image
    • Check selected mode (Padel/Tennis)
    • Shown when not connected with Padelshooter (first turn ON Padelshooter)
  • Start Here
    • Preloaded beginner-friendly training programs
  • Trainings
    • Advanced training programs with customizable settings
  • Programs
    • Create, save, or import custom training programs
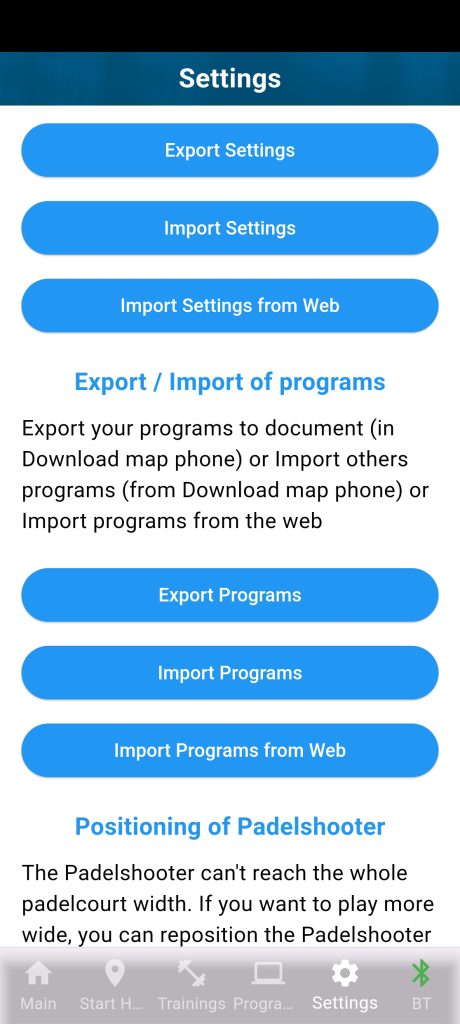
  • Settings
    • Language selection
    • App description
    • Import/export settings & programs
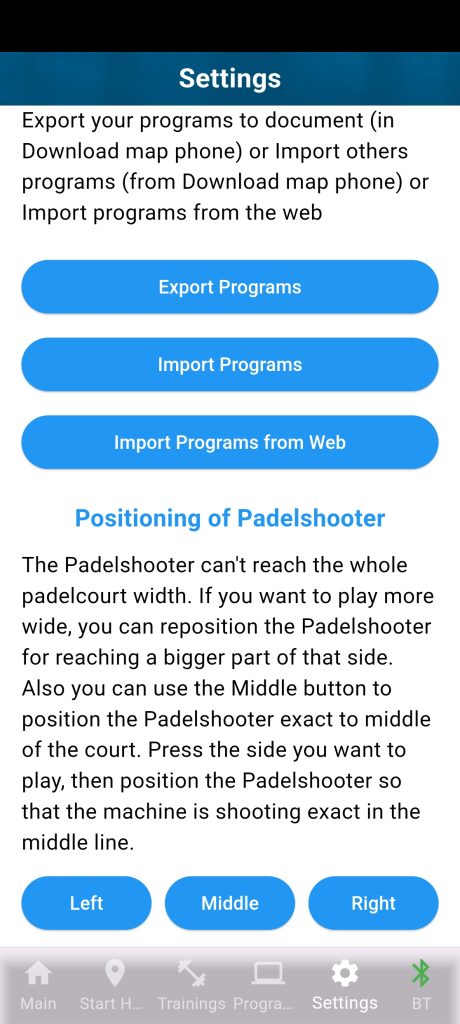
    • Smart Padelshooter positioning
  • Bluetooth picture to show the app is connected with Padelshooter (green) or disconnected (red)

How to Use Built-in Trainings

  1. Select a training (Start Here or Trainings).
  2. Adjust settings (or keep defaults):
    • Speed, Spin, Freq, Width, Height, Net, Delay
  3. Modify values using:
    • Short press (^/v): Adjust by ±1
    • Long press (^/v): Adjust by ±10
    • Manual entry: Tap to type a value
  4. Press “Play” to send settings to the Padelshooter.
    • Note: Changes only apply after hitting Play.

Key Settings Explained

SettingFunction
Speed (0–100)Ball velocity (higher = faster/deeper balls).
Spin (-/+)Backspin (–) or topspin (+).
Freq (0–100)Time between balls (0 = long pause, 100 = short pause).
WidthFixed position: Horizontal ball placement.
Random mode: Play area width (0 = single spot, 100 = full range).
HeightFixed position: Ball height.
Random mode: Maximum ball height.
Combination drills (e.g., volley-bandeja): High-ball height.
NetRandom mode: Minimum ball height.
Combination drills: Low-ball (volley) height.
Keep at 0 for 1 height shots, the Height defines the height of the ball. If set Net higher than Heigt, ball will be shot at Net position.
Delay (0–100)Extra pause after high balls in combo drills (0 = none, 100 = 2 sec).

Court Positioning

  • Select side: Left / Right / Both (full court = Left + Right).
  • Refine horizontal area (Trainings screen):
    • 0% = Far left | 100% = Far right.
    • Presets: “Left” (0–50%) | “Right” (50–100%).
  • Randomization:
    • Width = 0: No horizontal movement (fixed center).
    • Width = 100: Full random play within selected side.
    • Example: “Volley-Bandeja” with Width=50 → Shots randomized in half the court.

Pro Tip: Higher Speed or Height increases ball depth.

Programs Screen: Custom Training Creator

The Programs screen allows you to design personalized training sessions or use downloadable programs from Padelshooter (via “Import Programs from Web” in Settings).

Key Features:

  • Create programs with up to 60 shots.

  • Organize programs into categories for easy access.

  • Edit, copy, and reuse existing programs.

Start Here

Fixed

The Fixed Training mode is designed for perfecting a single shot at a consistent position. Ideal for repetitive drills—whether forehands, backhands, or any stroke you want to refine—this mode lets you control every detail of the ball’s trajectory.


How to Use Fixed Training

  1. Select “Fixed” Training

    • Choose this mode from the training menu in Start Here.

  2. Set Your Court Position

    • Select Side: Left, Right, or Both (for full-court drills).

  3. Adjust Ball Parameters

    • Speed (0–100):

      • Higher = deeper balls | Lower = shorter balls.

    • Spin:

      • Negative (–) for backspin/slice | Positive (+) for topspin.

    • Frequency (0–100):

      • Controls the pause between shots (0 = longest, 100 = shortest).

  4. Fine-Tune Placement

    • Width (0–100) within chosen Side:

      • 0 = far left | 100 = far right (within your selected side).

    • Height:

      • Set your desired ball height.

    • Net:

      • Not used in Fixed Training—keep at 0.

  5. Start Training

    • Press “Play” to begin your session.


Best Uses for Fixed Training

  • Repetition Drills: Lock in muscle memory for consistent strokes.

  • Target Practice: Isolate specific positions (e.g., deep backhands or short angles).

  • Spin Control: Experiment with slice/topspin at set speeds.

Tip: For advanced variability, combine multiple Fixed Training programs in the Programs screen!

Hor Movement

Horizontal Movement Training

The Horizontal Movement Training sharpens your lateral movement and reflexes by randomizing ball placement within a selected court side. Ideal for developing quick footwork and adaptive stroke techniques.


How to Use Horizontal Movement Training

  1. Select “Hor Movement” Training

    • Choose this mode from the training menu.

  2. Set Your Court Side

    • Left Side: 0–50% court width

    • Right Side: 50–100% court width

    • Both Sides: Full court randomization

  3. Control Randomization Range

    • Width (0–100) within chosen Side:

      • 0 = Fixed center (no variation)

      • 100 = Full side coverage (maximum variation)

      • Example:

        • Width=50 on “Right” side → Balls randomize between 25–75% of the Right side (covering half the right court).

  4. Adjust Shot Parameters

    • Speed: Higher values create deeper shots

    • Spin: (+) for topspin / (–) for backspin

    • Frequency: 0=slow tempo, 100=rapid fire

    • Height: Customize ball trajectory

    • Net: Leave at 0 (unused in this mode)

  5. Start Drilling

    • Press “Play” to begin dynamic training


Optimal Training Applications

  • Lateral Footwork: Develop explosive side-to-side movement

  • Reaction Training: Improve response to unpredictable shots

  • Zone Isolation: Target specific court positions (e.g., wide backhands)


2-Line

2-Line Training: Alternating Shot Drills

Perfect for both solo forehand/backhand practice and dual-player exercises, this mode alternates ball placement between left and right sides in consistent sequences.


Key Features

• Designed for 1 player working on stroke alternation
• Ideal for 2 players (one on each side)
• Customizable for any two-shot combination drills


How to Set Up 2-Line Training

 
  1. Select “2-Line” Training

    • Choose from your training menu

  2. Configure Shot Parameters

    • Set SpeedSpin, and Height for both sides

    • Adjust Frequency for shot tempo

  3. Position Settings

    • Left/Right alternation is automatic

    • Use Width to control lateral placement within each side (higher Width is the 2 positions more wide of each other)

  4. Special Notes

    • Net setting remains at 0 (unused)


Training Applications


For Solo Practice:

  • Perfect your forehand-backhand transitions

  • Develop consistent footwork patterns

For Two Players:

  • Simultaneous partner drills

  • Competitive reaction training

Pro Tips

• Start with slower Speed (and higher Height) to master positioning
• Gradually increase Frequency as skills improve
• Use Width adjustments to control difficulty

Vert Movement

Variable Height Drills

This mode creates dynamic vertical challenges by varying ball height between your set “Net” (lowest) and “Height” (highest) positions at a fixed horizontal location.


Key Features

• Trains adaptive stroke technique for different ball heights
• Fixed horizontal position with vertical variability
• Ideal for solo practice of volleys, lobs, and overheads


How to Set Up Vertical Movement Training

  1. Select “Vert Movement” Training
    Choose from your training menu

  2. Set Vertical Range

    • Net: Lowest ball position (typically volley height)

    • Height: Highest ball position (lob/overhead height)

  3. Fix Horizontal Position

    • Width (0-100) within chosen Side:

      • 0 = Far left

      • 100 = Far right

      • 50 = Center

  4. Adjust Other Parameters

    • Speed: Controls shot depth

    • Spin: Add topspin/backspin

    • Frequency: Pace between shots

    • “For lower-speed drills, increase the ‘Net’ value to prevent balls from dropping into the net while maintaining your desired height variation.”


Training Applications

Essential Drills:

  • Low-to-high transition practice

  • Overhead smash preparation

  • Volley consistency training

Skill Development:

  • Height adjustment reflexes

  • Swing path adaptation

  • Footwork for forward/backward movement


Pro Tips

• Start with smaller height variations (20-30% difference)
• Gradually expand range as skills improve
• Combine with lateral movement drills for advanced training


Technical Notes

• Horizontal position remains locked at set Width
• Vertical movement occurs randomly between Net and Height values
• Frequency controls time between shots


Random

PadelShooter training app session screen on a smartphone

Dynamic Multi-Directional Drills

The ultimate variability mode that combines unpredictable horizontal AND vertical ball placement for comprehensive adaptive training.


Key Features

• Full-court randomness – trains complete spatial awareness
• Combined dimensions – balls vary in both width and height
• Precision control – set your exact range parameters
• Ideal for reaction training, footwork development, and match simulation


How to Set Up Random Training

 
  1. Select “Random” Training Mode
    Access from main training menu

  2. Set Horizontal Range

    • Width (0-100) within selected Side:

      • 0 = No side-to-side movement (fixed position)

      • 100 = Full court width variation

  3. Set Vertical Range

    • Net: Lowest possible ball position

    • Height: Highest possible ball position

  4. Adjust Core Parameters

    • Speed: 0 (slow) to 100 (fast)

    • Spin: -50 (max backspin) to +50 (max topspin)

    • Frequency: Shot tempo (0=slow to 100=rapid)


Advanced Configuration Tips


For Targeted Practice:

  • Reduce Width range to focus on specific court zones

  • Tighten Net-Height gap for specialized height training

  • “For lower-speed drills, increase the ‘Net’ value to prevent balls from dropping into the net while maintaining your desired height variation.”

For Match Simulation:

  • Set Width 70-100 for full-court coverage

  • Use medium Height range (30-70) for realistic rally heights


Training Applications


Solo Drills:

  • Complete footwork development

  • Stroke adaptability training

  • Reaction time improvement

Coaching Uses:

  • Multi-player simultaneous drills

  • Competitive reaction games

  • Fatigue resistance training


Pro Optimization Tips

• Start with 50% ranges and gradually increase difficulty
• Use medium Frequency (40-60) for optimal challenge
• Combine with variable Spin for advanced stroke training


Technical Notes

• Horizontal and vertical movement occur independently
• Each shot calculates random placement within set ranges
• “Play” sends all parameters to machine simultaneously


Bandeja/Smash

High Ball Precision Drills

Specialized mode for perfecting your overhead shots by delivering consistent high balls to a fixed position – ideal for both bandeja technique and smash execution.


Key Features

• Fixed high ball position for repetitive practice
• Adjustable speed (slower for smashes, faster for bandejas)
• Single-position focus to build muscle memory
• Side selection for targeted court coverage


How to Set Up Bandeja/Smash Training

 
  1. Select Training Mode
    Choose either from the specialty menu or use Fixed training with high Height setting

  2. Select Your Side

    • Left / Right / Both sides

    • Pro Tip: Start with your dominant side first

  3. Set Shot Parameters

    • Height: High position (adjust for ideal contact point)

    • Width: Fixed lateral position (0-100)

    • Speed:

      • Bandeja: Higher speed (18)

      • Smash: Moderate speed (16)

    • Spin: Typically minimal (0-20) for clean practice

  4. Additional Settings

    • Frequency: Control shot tempo

    • Net: Set to 0 (unused in this mode)


Technical Execution

For Bandejas:

  • Higher ball speed = deeper court position

  • Consistent height for proper swing mechanics

For Smashes:

  • Slightly reduced speed for optimal positioning

  • Focus on downward angle of attack


Training Applications

Skill Development:

  • Bandeja technique refinement

  • Smash power and accuracy

  • Overhead shot footwork

Practice Routines:

  • 100-shot repetition drills

  • Target practice (use court markings)

  • Side-to-side movement integration


Pro Training Tips

• Start with Width 50 (center) before moving wide
• Gradually increase Speed as technique improves
• Film your swing to analyze contact point
• In Programs you can make 2 shots: smash (speed=16) and bandeja (speed=18)


Volley

Triple-Position Reflex Drills

Develop quick hands and precise net play with this specialized mode that alternates between three key volley positions – perfect for mastering backhand, body, and forehand volleys.


Key Features

• Smart 3-position alternation (Left/Middle/Right)
• Adjustable spread via Width parameter
• Randomized sequence for realistic reactions
• Ideal for net play development


How to Set Up Volley Training

 
  1. Select “Volley” Training Mode
    Access from the specialty training menu

  2. Choose Your Side

    • Left / Right / Both sides of court

    • Essential for proper positioning

  3. Set Position Spread

    • Width (0-100):

      • 0 = 1 position only (body volleys), no variation

      • 50 = Moderate spread

      • 100 = Maximum side-to-side coverage

  4. Adjust Shot Parameters

    • Height: Typical volley contact point

    • Speed: (20-50) for control practice

    • Spin: Minimal (0-20) for clean volleys

    • Frequency: 40-70 for realistic tempo


Position Details


Right-Handed Players:
← Left Position: Backhand volleys
• Middle Position: Body volleys
→ Right Position: Forehand volleys

Left-handed players simply reverse these


Training Applications


Beginner Drills:

  • Start with Width 0 (1 position only)

  • Focus on proper grip and footwork

Advanced Training:

  • Width 70-100 for full coverage

  • Combine with quick lateral steps

  • Set Frequency higher (50-100)

  • Set Speed higher (40+)

Doubles Specialization:

  • Simulate actual point sequences

  • With 2 players, both Sides selected and high Freq

  • Practice rapid transitions


Pro Optimization Tips


• Begin with slower Speed (30-40)
• Use moderate Frequency (50) initially
• Gradually increase difficulty as skills improve
• Record your footwork for technique analysis


Common Mistakes

⚠️ Forgetting to select your side first
⚠️ Setting Width too wide before mastering basics
⚠️ Using excessive ball speed too early


Technical Notes

• Ball always stays below net height
• Sequence randomly rotates through positions
• “Play” confirms all settings and starts playing

Bajada

Back-Wall Overhead Drill

Specialized mode for practicing the critical overhead strike after the ball bounces near the back glass.


Key Features

• High, deep ball trajectory simulating back-wall bounces
• Consistent positioning for repetitive technique training
• Adjustable parameters to match skill level
• Ideal for developing powerful returns


How to Set Up Bajada Training

 
  1. Select “Bajada” Training
    Choose from specialty training programs

  2. Set Court Position

    • Select Side (Left/Right/Both)

    • Width: Typically 40-60 for central positioning

  3. Configure Shot Parameters

    • Height: High setting (80-100) for overhead contact

    • Speed: Moderate (20) for realistic bounce depth

    • Spin: High (20-50) for let ball bounce higher after back glass

    • Frequency: 30-50 for recovery time


Technical Execution

• Ball arcs high and lands near back glass
• Player strikes at peak after bounce
• Focus on downward angle and power control


Pro Training Tips

• Start with higer Spin to let bounce ball higher after hit back glass
• Film your footwork for positioning analysis
• Alternate positioning between forehand/backhand balls


Backglass

Defensive Low-Bounce Drills

Specialized mode for mastering the aggressive backglass shot – a fast, low-bouncing ball with backspin that kicks off the rear wall.


Key Features

• Low trajectory with backspin for realistic bounce
• High-speed offensive shot simulation
• Adjustable difficulty via speed/spin/height
• Ideal for developing attacking plays and opponent pressure


Optimal Setup Parameters

  1. Core Settings:

    • Height: Very low (15-30)

    • Speed: High (25-60), Height should be set accordingly

    • Spin: Significant backspin (0 to -50)

  2. Positioning:

    • Width: 40-60 for center-line practice

    • Side: Select based on drill focus

  3. Advanced Options:

    • Frequency: 40-70 for rapid sequences

    • Net: Set to 0 (unused)


Progression Levels

Beginner: Speed 25 / Height 35 / Spin 0

Intermediate: Speed 40 / Height 20 / Spin 0

Advanced: Speed 60 / Height 15 / Spin -50


Training Applications

• Offensive shot return development
• Fast-reaction footwork drills
• Backwall defensive counter-training


Expert Tips

• Focus on early racket preparation
• Practice both forehand and backhand angles
• Keep racket low, try hit ball without backswing, just touch ball

Trainings

Random

Dynamic Multi-Directional Drills

The ultimate variability mode that combines unpredictable horizontal and vertical ball placement for comprehensive adaptive training – now with precision court positioning control.


Key Features

• Full-court randomness – Trains complete spatial awareness
• Combined dimensions – Balls vary in both width and height
• Precision control – Set exact horizontal ranges with Left% and Right%
• Ideal for reaction training, footwork development, and match simulation


How to Set Up Random Training


  1. Select “Random” Training Mode

  2. Choose Side: Left (0-50%), Right (50-100%), or Both (full court) or set the Left % and Right % on the court for more detailed horizontal area to play.

  3. Adjust core parameters (Speed, Spin, Height)

Advanced Version (Trainings Screen)

 
  1. Additional Court Positioning controls:

    • Left%: Start of playable zone (0% = far left of whole court)

    • Right%: End of playable zone (100% = far right of whole court)

    • Example setups:

      • Right-quarter practice: Left%=75Right%=100

      • Central 60% focus: Left%=20Right%=80

  2. Enhanced Shot Parameters:

    • Vertical range: Net (lowest) to Height (highest)

    • Speed: 0 (slow) to 100 (fast)

    • Spin: -50 (max backspin) to +50 (max topspin)


Pro Training Applications


For Targeted Practice:

  • Narrow Left% and Right% to isolate weak zones

  • When playing Right side, use 50-75% zone for training different backhands (for right handed player) and specify Width=100

  • Use Random training for backhand volleys at different heights at Right side, with Left% 50 and Right% 75 and Speed=30, Width=100, Height=40, Net=25


Technical Notes

• Horizontal and vertical movement occur independently within set ranges
• Left%/Right% values apply to the entire court width
• Changes only take effect after pressing “Play”

Hor Movement

Horizontal Movement Training

The Horizontal Movement Training sharpens your lateral movement and reflexes by randomizing ball placement within a selected are of court. Ideal for developing quick footwork and adaptive stroke techniques. The difference with Start Here is that a specific zone could be specified with Left % and Right %.


How to Use Horizontal Movement Training

  1. Select “Hor Movement” Training

    • Choose this mode from the training menu.

  2. Set Your Court Side

    • Left Side: 0–50% court width

    • Right Side: 50–100% court width

    • Both Sides: Full court randomization

    • Zone isolation: Use Left % and Right % to limit the field more specific

  3. Control Randomization Range

    • Width (0–100) within chosen Side/Zone:

      • 0 = Fixed center (no variation)

      • 100 = Full side coverage (maximum variation)

      • Example:

        • Width=50 on “Right” side → Balls randomize between 25–75% of the Right side (covering half the right court).

  4. Adjust Shot Parameters

    • Speed: Higher values create deeper shots

    • Spin: (+) for topspin / (–) for backspin

    • Frequency: 0=slow tempo, 100=rapid fire

    • Height: Customize ball trajectory

    • Net: Leave at 0 (unused in this mode)

  5. Start Drilling

    • Press “Play” to begin dynamic training


Optimal Training Applications

  • Lateral Footwork: Develop explosive side-to-side movement

  • Reaction Training: Improve response to unpredictable shots

  • Zone Isolation: Target specific court positions (e.g., wide backhands)


2-Line

2-Line Training: Alternating Shot Drills


Perfect for solo forehand/backhand practice or dual-player exercises, this mode alternates ball placement between two customizable court zones. The Trainings screen version adds precision control with Left% and Right% for targeted practice.


Key Features

 
  • Dual-mode functionality:

    • Start Here: Simple left-right alternation (default zones)

    • Trainings: Customizable zones via Left% and Right%

  • Adaptable for:
    • Solo stroke alternation
    • Two-player competitive drills


Setup Guide


1. Select Training Mode

  • Choose “2-Line” from the menu

2. Define Court Zones (Trainings Screen Only)

  • Left%: Start position of left zone (0% = far left)

  • Right%: End position of right zone (100% = far right)
    Example Configurations:

    • Full court: Left%=0Right%=100

    • Right-side focus: Left%=50Right%=100

    • Narrow central drill: Left%=30Right%=70

3. Configure Shot Parameters

ParameterFunctionRecommended Range
SpeedBall velocity20-50 (start low)
HeightContact point15-70 (overhead)
SpinBall rotation±20 for control
FrequencyShot tempo40-70 (adjust skill)
WidthGap between lines0-0 (wider = harder)

4. Special Notes

  • Net: Always set to 0 (unused)

  • Side selection: Required before start


Training Applications

For Solo Practice:

  • Forehand-backhand transitions

  • Footwork patterns (side-to-side movement)

For Two Players:

  • Simultaneous partner drills

  • Competitive reaction games

Advanced Uses:

  • Create overlapping zones (Left%=40-60Right%=50-70)

  • Combine with variable Height for volley-smash combos


Progression Tips

  1. Beginners:

    • Use default zones

    • Start with Speed=50Frequency=40

  2. Intermediate:

    • Narrow zones (Left%=40Right%=60)

    • Increase Width for wider spacing

  3. Advanced:

    • Asymmetric zones (e.g., Left%=20-40Right%=70-90)

    • Add spin variations

                              Example court Width:
0%───────────────────────────────100%
     │               │<————————————>|              │
               Left%=20                                  Right%=80
                                          Playzone

Cross 1

Low-High Combination Drill

Master alternating shots with this strategic sequence:
1. Low left ball (Net height) → 2. High right ball (Height setting)
Ideal for training footwork transitions and timing between defensive and offensive shots.


Key Features

  • Dual-ball sequence: Fixed low-left + high-right pattern

  • Smart delay system: Extra pause only after high balls

  • Precision control: Adjust spacing, timing, and heights independently

  • Perfect for: Footwork drills, swing transitions, and match simulations


Setup Guide

1. Select “Cross 1” Training

Choose from training programs.

2. Configure Shot Parameters

ParameterFunctionRecommended Range
SpeedBall velocity15-30 (lower for control)
NetLeft ball height (low)25-40 (volley height)
HeightRight ball height (high)60-90 (overhead)
WidthDistance between shots50-100 (wider = more movement)
FreqBase pause between all shots40-80 (tempo control)
DelayExtra pause after high ball only0-100 (50 = 1 sec)

3. Special Notes

  • Delay logic:

    • 0% = No extra pause

    • 100% = 2-second pause after high ball

    • Only applies to the low→high transition

  • Side selection: Required (typically set to “Both”)


Technical Execution

Ball Sequence:

  1. Low left ball (Net setting) → Immediate return

  2. High right ball (Height setting) → Delay → Repeat

Timing Example:

  • Freq=60 + Delay=50 =

    • 3s base pause (Freq)

    • +1s after high balls (Delay)


Training Applications


Footwork Development:

  • Practice quick recovery after overhead shots

  • Train weight transfer (low→high transitions)

Match Scenarios:

  • Simulate defensive lobs → offensive smashes

  • Improve stamina for long rallies

Progression:

  1. Beginner: Low Width (50), Delay=50, Freq=30

  2. Intermediate: Add spin variations, Width=80, Delay=30, Freq=60

  3. Advanced: Max Width (80-100), Delay=20, Freq=80

Pro Tips


• Start with Speed=20 to focus on technique
• Use Delay=50 initially to master transitions
• Combine with Width=100 for advanced footwork

Cross 2

High-Low Combination Drill

Master alternating shots with this strategic sequence:
1. Low right ball (Net height) → 2. High left ball (Height setting)
Ideal for training footwork transitions and timing between defensive and offensive shots.


Key Features

  • Dual-ball sequence: Fixed low-left + high-right pattern

  • Smart delay system: Extra pause only after high balls

  • Precision control: Adjust spacing, timing, and heights independently

  • Perfect for: Footwork drills, swing transitions, and match simulations


Setup Guide


1. Select “Cross 2” Training

Choose from training programs.

2. Configure Shot Parameters
ParameterFunctionRecommended Range
SpeedBall velocity15-30 (lower for control)
NetLeft ball height (low)25-40 (volley height)
HeightRight ball height (high)60-90 (overhead)
WidthDistance between shots50-80 (wider = more movement)
FreqBase pause between all shots40-80 (tempo control)
DelayExtra pause after high ball only0-100 (50 = 1 sec)
3. Special Notes
  • Delay logic:

    • 0% = No extra pause

    • 100% = 2-second pause after high ball

    • Only applies to the low→high transition

  • Side selection: Required (typically set to “Both”)


Technical Execution

Ball Sequence:

  1. Low left ball (Net setting) → Immediate return

  2. High right ball (Height setting) → Delay → Repeat

Timing Example:

  • Freq=60 + Delay=50 =

    • 3s base pause (Freq)

    • +1s after high balls (Delay)


Training Applications

Footwork Development:

  • Practice quick recovery after overhead shots

  • Train weight transfer (low→high transitions)

Match Scenarios:

  • Simulate defensive lobs → offensive smashes

  • Improve stamina for long rallies

Progression:

  1. Beginner: Low Width (50), Delay=50, Freq=30

  2. Intermediate: Add spin variations, Width=80, Delay=30, Freq=60

  3. Advanced: Max Width (80-100), Delay=20, Freq=80

Pro Tips

• Start with Speed=20 to focus on technique
• Use Delay=70 initially to master transitions
• Combine with Width=70 for advanced footwork

Volley - Bandeja

PadelShooter training app shot settings on a smartphone

Net-to-Back Transition Drill

Simulates match scenarios where you attack at the net (volley) and recover from deep balls (bandeja). Trains quick transitions and adaptive footwork.


Key Features

  • Dual-ball sequence:

    • Volley (low, at net) → Bandeja (high, deep)

  • Smart delay: Extra pause only after bandeja (like Cross training)

  • Randomized horizontal placement: Controlled by Width setting

  • Customizable:

    • Fixed positions (Width=0) or variable (Width=1-100)

    • Side selection (Left/Right/Both) or precise zones (Left%/Right%)


Setup Guide

1. Select “Volley-Bandeja” Training

Choose from specialty training programs.

2. Configure Shot Parameters

ParameterFunctionRecommended Range
NetVolley height (low)25-40
HeightBandeja height (high)60-90
WidthHorizontal randomness:
  • 0 = Fixed center

  • 1-100 = Variable (higher = wider range) | 30-70 (start moderate) |
    Freq | Base pause between shots | 40-60 |
    Delay | Extra pause after bandeja (0-100% of 2 sec) | 30-70 (50 = 1 sec) |
    Side | Left/Right/Both or custom Left%/Right% | — |

3. Special Notes

  • Delay: Only applies after bandeja (time to return to net)

  • Width=0: Both shots land at identical horizontal positions

  • Side selection: Required before starting

  • Go to net: Go back to net after bandeja to hit a good volley (don’t be lazy 🙂 )


Technical Execution

Ball Sequence:

  1. Volley (Net height, random/fixed width) → Immediate return

  2. Bandeja (High, random/fixed width) → Delay → Repeat

Example Configuration:

  • Width=50Delay=40:

    • Volley and bandeja randomize across 50% of selected side

    • 0.8 sec pause after bandeja


Training Applications

For Singles/Doubles:

  • Practice net approaches after defensive shots

  • Improve recovery speed from deep positions

Progression:

  1. BeginnerWidth=30Delay=70 (more time to react)

  2. Intermediate: Add spin variations, Width=70, Delay=30, Freq=60

  3. AdvancedWidth=100Delay=20 (full court + quick recovery), Freq=80


Pro Tips

• Start with lower Width (30-50) to focus on footwork
• Use higher Delay initially (60+) to master transitions
• Film your net return to optimize movement efficiency

x Volleys - 1 Bandeja

Net Vigilance Drill

Sharpens net dominance while preparing for unexpected lobs. Trains volley consistency with intermittent deep bandeja challenges to simulate real-match surprises.


Key Features

  • Unpredictable sequence:

    • 1-10 volleys (low, at net) → 1 random bandeja (high, deep)

  • Smart delay: Extra pause only after bandeja for recovery

  • Adaptive positioning:

    • Fixed (Width=0) or variable (Width=1-100) horizontal placement

    • Custom zones via Left%/Right%


Setup Guide

1. Select “x Volleys – 1 Bandeja” Training

Choose from specialty net-play programs.


2. Configure Shot Parameters

ParameterFunctionRecommended Range
NetVolley height25-40
HeightBandeja height60-90
WidthHorizontal spread:
• 0 = Fixed center
• 1-100 = Random range
40-80
SpeedBall velocity (Bandeja speed should be good)15-30
FreqBase tempo between shots30-80
DelayExtra pause after bandeja (0-100% of 2 sec)10-60 (50 = 1 sec)
SideLeft/Right/Both or Left%/Right% zones

3. Special Notes

  • Bandeja frequency: Automatically interspersed (every 1-10 volleys)

  • Width=0: All shots align at 1 hor position

  • Critical: Return to net immediately after bandeja!


Technical Execution

Typical Sequence:

  1. Volley → Volley → Volley → Bandeja → (Delay) → Repeat

Example Configuration:

  • Width=60Delay=30:

    • Volleys randomize across 60% of court

    • 0.6 sec extra pause to recover after bandeja


Training Applications

For Net Players:

  • Maintain volley focus while staying lob-ready

  • Improve emergency backward movement

For Coaches:

  • Train players to “expect the unexpected”

  • Simulate aggressive net-play scenarios


Progression Levels

LevelWidthDelayFreqGoal
Beginner407050Master recovery timing
Intermediate703070Add spin variations
Advanced1002090Full-court reactions

Pro Tips

• Anticipate: Treat every volley as if a lob could come next
• Footwork: Use the delay to practice explosive net returns
• Eyes up: Track ball trajectory early during bandeja

1 Volley - x Bandejas

Backcourt Vigilance Drill

Develops bandeja consistency while preparing for surprise net attacks. Trains deep-court dominance with intermittent volley challenges to simulate opponent counterplays.


Key Features

  • Unpredictable sequence:

    • 1-10 bandejas (high, deep) → 1 random volley (low, at net)

  • Smart delay: Extra pause after each bandeja

  • Adaptive positioning:

    • Fixed (Width=0) or variable (Width=1-100) horizontal placement

    • Custom zones via Left%/Right%


Setup Guide

1. Select “1 Volley – x Bandejas” Training

Choose from Trainings.

2. Configure Shot Parameters

ParameterFunctionRecommended Range
NetVolley height25-40
HeightBandeja height60-90
WidthHorizontal spread:
• 0 = Fixed center
• 1-100 = Random range
40-80
SpeedBall velocity (Bandeja speed should be good)15-30
FreqBase tempo between shots30-80
DelayExtra pause after bandeja (0-100% of 2 sec)10-60 (50 = 1 sec)
SideLeft/Right/Both or Left%/Right% zones

3. Special Notes

  • Volley frequency: Automatically interspersed (every 1-10 bandejas)

  • Width=0: All shots align horizontally

  • Critical: Sprint to net immediately on volley detection!


Technical Execution

Typical Sequence:

  1. Bandeja → Bandeja → Bandeja → (Delay) → Volley  → Repeat

Example Configuration:

  • Width=70Delay=40:

    • Bandejas randomize across 70% of court

    • 0.8 sec extra pause for bandeja


Training Applications

For Baseline Players:

  • Maintain bandeja rhythm while staying net-ready

  • Improve explosive forward movement

  • Train forward / backward footwork

For Coaches:

  • Train players to transition from defense to attack

  • Simulate opponent’s surprise net plays


Progression Levels

LevelWidthDelayFreqGoal
Beginner506040Master net approaches
Intermediate703060Add depth variations
Advanced1002080Full-court reactions

Pro Tips

• Stay on toes: Treat every bandeja as a potential volley trigger
• Split-step: Time your jump as the ball leaves the machine
• Short backswing: Prepare for quick volley reactions

x Volleys - x Bandejas

Complete Net-to-Baseline Drill

Master seamless transitions between net play and deep-court defense with this dynamic, unpredictable sequence that alternates volleys and bandejas in random order.


Key Features

  • True match simulation:

    • 1-10 volleys (low, at net) → 1-10 bandejas (high, deep) in random order

  • Dual delay system:

    • Short pause after volleys (reset position)

    • Extended pause after bandejas (recovery time)

  • Smart positioning:

    • Fixed (Width=0) or random (Width=1-100) horizontal placement

    • Custom zones via Left%/Right%


Setup Guide

1. Select “x Volleys – x Bandejas” Training

Access from Trainings.

2. Configure Shot Parameters
ParameterFunctionRecommended Range
NetVolley height25-40
HeightBandeja height60-90
WidthHorizontal spread:
• 0 = Fixed center
• 1-100 = Random range
40-80
SpeedBall velocity (Bandeja speed should be good)15-30
FreqBase tempo between shots30-80
DelayExtra pause after bandeja (0-100% of 2 sec)10-60 (50 = 1 sec)
SideLeft/Right/Both or Left%/Right% zones
3. Special Notes
  • Sequence: Randomly alternates 1-10 of each shot type

  • Width=0: Perfect for footwork repetition

  • Key focus: Quick transitions between net and baseline


Technical Execution

Sample Sequences:

  1. Volley → Volley → Volley →Volley → Bandeja → Bandeja 

  2. Bandeja → Volley → Bandeja → Bandeja → Bandeja → Volley

Example Configuration:

  • Width=60Bandeja Delay=40:

    • Shots randomize across 60% of court

    • 0.8s recovery time after bandejas


Training Applications

For Competitive Players:

  • Simulates real-match unpredictability

  • Develops explosive transitions

  • Improves shot anticipation

For Coaches:

  • Customize difficulty via delays

  • Train adaptive footwork patterns

  • Develop mental resilience


Progression Levels

LevelWidthBandeja DelayFreqFocus
Beginner506040Basic transitions
Intermediate703060Add spin variations
Advanced1002080Full-court reactions

Pro Tips

• Stay light: Keep weight centered for quick direction changes
• Eye discipline: Track ball early during transitions
Optimization:

  • After every bandeja, return to net

  • Use volley short backswing

Programs

Custom Training Builder

Create, manage, and execute personalized training sequences with full control over every shot parameter.


Key Features

  • Build multi-shot programs (up to 60 shots)

  • Download pre-made programs via web import

  • Intuitive organization by categories and search

  • One-touch control: Play/Off buttons for machine control


Program Management

1. Loading Programs

  • Method 1:

    1. Press Category

    2. Select program from displayed list

  • Method 2:

    1. Press Category → “Load Program”

    2. Choose from stored programs

2. Saving Programs

  • Enter name in “Program Name”

  • Press “Save Program”

    • Tip: Rename + Save to duplicate existing programs

3. Web Import

  1. Go to Settings → “Import Programs from Web”

  2. Return to Programs screen to access new categories


How to Create a Program

1. Name Your Program

  • Edit “Program Name” field (e.g., “Elite Smash Sequences”)

2. Assign Category

  • Select existing or create new (e.g., “Overheads/Advanced”)

3. Build Shot Sequence

  1. Press “Add Shot”

  2. Configure parameters (Speed/Spin/Width/etc.)

  3. Repeat for all shots

4. Advanced Editing (select a shot first)

  • Copy Shots: Select → “Copy” → Modify specific parameters

  • Reorder“Move Up/Down” to adjust sequence

5. Save

  • Always press “Save Program” to store changes


Program Execution

  • “Play”: Sends entire program to Padelshooter

  • “Off”: Immediately stops program execution


Organization Tools

Categories

TypeExample Names
SkillVolleys, Serves, Bandejas
LevelBeginner, Intermediate
SideLeft-Court, Right-Court
GroupDoubles, Junior Drills

Search Function

  • Category Search: Select category first

  • Global Search: Press “Reset” before searching


Pro Workflow Tips

• Use “Copy” to create variations (e.g., same drill for both sides)
• Name programs clearly (e.g., “FH Volleys – Wide Angles”)
• Test new programs with low Speed first
• To fast create a program, define 1 good shot (volley?), select this shot, copy several times and only change the Width value of every shot to have volleys at forehand, backhand, body, etc.


[Program Flow]
1. Create → 2. Save → 3. Load → 4. Play
↑____________↓
Modify & Resave


Settings

PadelShooter training app drill library on a smartphone

System Configuration

Central hub for app customization, device optimization, and training program management.


Configuration Options

1. Language Selection

  • 15 Supported Languages:
    English (Default) | Spanish | French | Chinese | Portuguese
    Polish | Swedish | Finnish | Italian | German
    Japanese | Arabic | Latvian | Dutch | Norwegian

2. Sport Mode

  • Padel (Default)

  • Tennis (Adjusts ball trajectories and terminology)

3. App Description

  • Brief overview of Padelshooter functionality

  • Version information


Data Management

Import/Export

FunctionDescription
ExportSave current settings/programs to device
ImportLoad previously saved configurations
Import from WebDownload optimized programs/settings (Cloud-based)

Note: Web imports populate the Programs screen automatically


Machine Positioning Optimization

For Solo Training Efficiency:

  1. Calibrate Padelshooter to middle line

    • Shoots a test ball to see if its positioned middle of court
  1. Left-Side Play:

    • Set machine to treat court center as far right

    • Enables natural sidewall usage

  2. Right-Side Play:

    • Set machine to treat court center as far left

Benefits:

  • Calibrate Padelshooter to middle of court

  • Focus on 1 side with possibillity to shoot balls towards sidewalls

Padelshooter 3A/3B/Smart/MAX

Bluetooth connection with PadelShooter

There are several reasons why a bluetooth connection could not be made with the PadelShooter. Below we explain some and how you can test these.

Padelshooter BLE Connection Issues: Verified Fixes

For Low-Energy (BLE) connections only, BLE is the newer bluetooth version. Note: We found that iPhone bluetooth (the Apple bluetooth version) is lower distance range than many Android phones. If you can choose both mobiles for controlling the Padelshooter, choose an Android phone!

1. Essential Checks

✔ BLE Compatibility

  • Your device must support Bluetooth 4.0+ (all modern phones do).

✔ Permissions (Critical for BLE)

  • iPhone: Enable Local Network in Settings → Padelshooter

  • Android: Allow Location + Nearby Devices permissions

✔ Distance Limitations

  • See if a distance of 3 meters (10 ft) works to make a connection

  • iPhones sometimes have problems with 10+ meters, especially when phone is in a pocket


2. Device-Specific Solutions

📱 For iPhones:

  • Issue: Weak BLE signal stability

  • Fix:

    1. Place phone within arm’s reach of Padelshooter

    2. Disable WiFi temporarily (2.4GHz interference)

    3. Toggle Airplane mode on/off to reset radios

📱 For Samsung/Android:

  • Issue: BLE stack glitches

  • Explanation: Samsung made their own phone version of bluetooth which has some “energy savings”. The result is that many Samsung phones don’t scan for devices they don’t know. To make the Padelshooter a “known device”, use an app like nRF Connect to scan for devices.

  • Proven Fix:

    1. Install nRF Connect (BLE debug app)

    2. Scan → Select “Padelshooter” → Connect once

    3. Now open Padelshooter app – should connect instantly


3. Connection Recovery

🔹 Force-Close App → Reopen
🔹 Restart Phone Bluetooth:

  • Android: Settings → Bluetooth → Toggle off/on

  • iPhone: Control Center → Tap Bluetooth icon twice
    🔹 Clear BLE Cache (Android Only):

  • Settings → Apps → Show system → Bluetooth → Storage → Clear cache
Ball block(s)

There are several reasons for a ball block. Below we explain some and how you can solve this. Sure all balls should be dry, wet balls often result in a ball block because the shooting wheels don't get grip on the wet balls. We advice to not use wet balls and also, when it starts raining, pick all balls as soon as possible and dry it before using again.
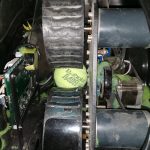
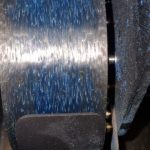
Padelshooter Ball Block: Causes & Fixes

1. Wet Balls

  • Problem: Moisture reduces wheel grip.

  • Solution:

    • Always use completely dry balls.

    • Store balls in a dry container between sessions.

2. Slippery Shooting Wheels

  • Check: Feel wheel surface for (blue) court material buildup.

  • Quick Fix:

    • Lightly roughen wheels with fine-grit sandpaper or a file.

    • Avoid excessive filing – stop once grip improves.

  • Permanent Fix:

    • Contact De Racketclub for professional wheel resurfacing.

3. Obstructing Ball

  • Problem: A single ball jammed near wheels blocks the system.

  • Solution:

    1. Power off the machine.

    2. Remove ALL balls from the internal tray.

    3. Visually inspect wheel area with a flashlight.

    4. Reinsert balls one by one to test.


Prevention Tips

✔ Regular Maintenance: Clean wheels weekly with a dry cloth.
✔ Ball Quality: Replace worn/compressed balls (they slip more easily).
✔ Storage: Keep machine covered when not in use to avoid moisture buildup.


When to Seek Help

→ If blocks persist after trying all fixes, contact De Racketclub for a wheel inspection.

Padelshooter Troubleshooting Guide

1. Feeder Running Non-Stop

  • Cause:

    • Dirty/felt-covered sensor (below feeding hole)

    • Loose sensor connector (from ball impact)

  • Solution:

    1. Power off machine

    2. Vacuum sensor area thoroughly

    3. Check connector on main board

    4. Test with 1-2 balls before full reload

2. Incorrect Ball Speed

  • Check First:

    • Verify sport mode (Padel/Tennis)

    • Confirm manual speed setting (don’t rely on defaults)

  • Advanced Fix:

3. Limited Shot Coverage

  • Quick Checks:

    • Both “Left” and “Right” enabled?

    • Width set to 100?

    • Correct Side% ranges (0-100%)?

  • Pro Tip: Test with Width=0 first to verify center alignment

4. Netshots Occurring

ScenarioSolution
Fixed-height trainingsIncrease “Height” value
Random-height trainingsRaise “Net” minimum height
Programmed sequencesAdd safety margin (+10% height)

5. Height Setting Ignored

  • Critical Check:

    • “Net” must be ≤ “Height”

    • Set “Net”=0 for absolute control

  • Note: Machine prioritizes “Net” as minimum height

6. Speed Transition Issues (Programs)

For better low-speed shots after highspeed:

  1. Insert transition shot at intermediate speed

    • Example: 100 → 60 → 30 instead of 100 → 30

  2. Increase pause time (lower Frequency)

  3. Use more extreme values (very low speeds may need 5-10)

7. Volley-Bandeja Optimization

Step-by-Step Setup:

  1. First configure perfect bandeja:

    • Set ideal speed (15-30)

    • Adjust height (60-90)

  2. Then add volleys:

    • Start with Height=25-40

    • Fine-tune while maintaining bandeja quality

  3. Adjust Delays:

    • Longer pauses help wheel speed changes


Prevention Tips

  • Weekly Maintenance:

    • Clean sensors with compressed air

    • Verify all connectors

  • Ball Management:

    • Use only dry, regulation balls

    • Replace worn balls annually

  • Software:

    • Regularly update app

    • Recalibrate after firmware updates


When to Contact Support

→ If issues persist after all checks
→ For hardware repairs (wheel resurfacing, sensor replacement)
→ Speed calibration beyond manual adjustment

Using machine

The machine has a lot of features and can be exactly set for the level of the player. Some players say the machine is very difficult to use and others find it very useful that they can set the machine exactly as they want. Some common misunderstandings and using the machine in a better way, are described here.

fastballsmall

The machine is shooting too fast for all trainings

During the development of the Padelshooter, there were some small hardware changes. One of these changes was that newer models shoot with a higher speeds than earlier versions. Because of this, in the app you could set a value for the Maximum Speed of the machine (1-250). The settings in the app for the speed are all percentages from 0-100 and is a % of this Maximum Speed. So, if the speed for all trainings is too fast, you could change this Maximum Speed (for example from 90 to 60). Then a speed in a training of 100% means it is the highest possible speed from "Max Speed" 60 (and not 90 anymore). This could also be used when there is wind on an outside court. When the wind is in front of the machine, the balls are shot slower because of the wind and these land not as deep as normally. Then, changing the speed (for example from 90 to 120) will help to let bounce the balls at the same location as normally (without wind).

manyballssmall

Balls were shot too fast behind each other

For the Trainings screen and the Programs screen, the Frequency setting could be changed lower or higher for all balls. For example when you play "Random" balls and you have not enough time to hit the next ball(s), set the Frequency (slider or above type the number manually) lower. For trainings with a specific high ball (Bandeja - Volley), often the volley is at the right frequency but for the high ball (Bandeja) you need more time before the next volley will be shot. For an extra pause after high balls, you can set an extra pause ONLY after the high ball (this extra pause is not after the volleys). Go to the Config screen and change the "Pause Level" (and save by "Write for Single" or "Write for Doubles"). The "Pause Level" adds an extra pause only after the high ball from 0 (no extra pause) to 100 (2 secs extra pause). This "Pause Level" is used in the trainings with Bandeja/Volley and Cross trainings, but not in de 2-line Bandeja/Volley because this is mainly used for 2 players and so no pause is needed.

ballsinnetsmall

Some balls are shot in the net

Some trainings vary the height and also you could set all trainings with different speeds. If the speed is very low, the ball won't go over the net anymore, the speed is too low. Even though, the speed migh be right for the player. Then you can set the "Net" position in the Config screen for every training. The Net position is a minimal height and, for that training, the machine won't shoot lower than this net position. So, if you lower the speed, which is the right speed for you, and then the/some balls were shot into the net then, set the "Net" position higher (for example, when the net position in the training is 20, set to 25 or 30). Remember that the ball will NEVER be shot below the "Net" position, even when the "Height" is set to a lower position! This Net position is also very useful in trainings where the height varies. If, for example, in a Random training the lowest balls were shot into the net, set the Net position higher. The lowest balls then won't be shot lower than this net position. Also when you want to train bandeja's but not always at the same height (for example between height 70 and 100), you can get use the "Random" training with a Net position set at 70 and a height of 100. Then the balls will be shot randomly between height 70 and 100, you can also set the "Width" position to als vary the horizontal position of the random balls. Also in Bandeja - Volley trainings, the Net position is very useful to set the height of the volleys. The machine will shoot high and low balls. The bandeja will be shot at the "height" position and the volleys will be shot at the Net position.

Padelshooter 1

Bluetooth connection with PadelShooter

There are several reasons why a bluetooth connection could not be made with the PadelShooter. Below we explain some and how you can test these.

The machine is already connected with someone else

Bluetooth can only connect with one at a time. If someone else already connected with the machine, you can't connect another. You could easily check this by looking inside the machine. The board is left from the shooting wheels and, when you turned on the machine, a lamp is blinking. If the lamp is blinking very fast without any pause, nobody else is connected yet, so it should be free to connect with your app. When the lamp is blinking 2 times fast and then a pause of about 2 secs, someone else already connected with the machine.
If the light is blinking 2 times fast with a pause, you know that someone connected with the machine earlier and this is the reason that you can't connect anymore. But "someone else" could also be yourself. If you already loaded the app (or another version) on your own phone, the bluetooth connection could already have been made. If you are the only one to use the machine, you could turn OFF and ON the machine and the other bluetooth connection is then disconnected. Also you could check the other apps on your own phone or someone else in your neighbourhood, if he/she has loaded the app and made a connection.

Not connected...........................................................................................Already connected by someone
(press on picture to see)

Bluetooth is not working properly

Check the lamp in the machine. Is it blinking, after the machine has been turned on? If there is no blinking lamp in the machine, there might be something wrong with the bluetooth part of the machine. You can even check this by going to "Settings" on your mobile phone, Bluetooth, and then see if there is a "Padelshooter" name in "Connected devices" list or "Available devices" list. If the "Padelshooter" is in the "Connected devices" list, press on it and "Disconnect the device". Then, when machine is turned on, it should find the Padelshooter name and show in the "Available devices" list. You'd better contact De Racketclub to solve this.

Is bluetooth on your phone set correctly?

First, "Bluetooth" on your phone should be turned ON. At the top of your phone, the bluetooth icon (see icon at top of this subject) should be visible. Also, the PadelShooter app should have enough rights to work well. Even though the app should ask you for these rights, it is good to check if the rights on your phone for the PadelShooter app are sufficient. On your phone, go to Settings, Apps, All apps, Search for the PadelShooter app and select it, choose "Permissions". Check if the permissions "Location" (and "Nearby devices" for new Android 12 phones or higher) are allowed. If not, allow permission for it.

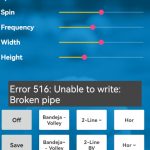
Error 516: Unable to write: Broken pipe

The app still thinks there is a connection with the machine but this is not true, the connection is lost. Maybe the machine has been turned off and on? Stop the app and start it again or go to the main app screen and select the BLUETOOTH button, the app automatically reconnects. The app still shows these messages some time but you can use the app again and the messages stop after a while.

Ball block(s)

There are several reasons for a ball block. Below we explain some and how you can solve this. Sure all balls should be dry, wet balls often result in a ball block because the shooting wheels don't get grip on the wet balls. We advice to not use wet balls and also, when it starts raining, pick all balls as soon as possible and dry it before using again.
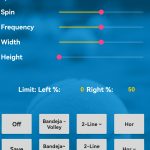
The shooting wheels are slippery

On some padel courts (for example the blue "Mondo" courts), small plastic pieces go into the balls and, when shooting, the ball gets hotter and the plastic melts on the wheels and forms a hard slippery layer on the wheels. This is not only on the PadelShooter machines but on ALL ballmachines. You can feel the wheels (machine off!) if these feel slippery, also the surface of the wheels are colored blue. Most outside courts are made of artificial grass (with sand in-between) and have no problems with this. To solve this, the wheels should be made more rough to have again good grip on the balls. This can be done with sand paper or (better) a round electric file. Best is to contact De Racketclub for this. Making the wheels more rough is often a temporary solution but De Racketclub has a definitive solution for this which will be done by us when you send back the machine, this solution is free but only the shipping costs you should pay.

balldown

Ball has fallen down without shooting

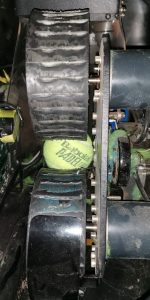
If a ball has fallen down when the machine is not shooting and so the shooting wheels don't work, the ball will stop before the shooting wheels and these NEVER will turn, when starting the machine. You can also feel that a ball blocks by turning the upper wheel by hand, this feels as if the wheel has a brake. ALWAYS the ball should first be removed from the guide just behind the shooting wheels (seen from the position as seen in above picture), before playing with the machine. You can do this by turning off the machine, press the shooting wheels to the most right (when standing before the shooting hole) so you can easier with your left hand pickup the ball(s) from the ball guide just behind the shooting wheels. Often, when 1 ball blocks the shooting, many other balls fall down (but aren't shot) till there are many balls in the machine and no balls could fall down anymore. All balls should then be removed before using the machine again. When there is only 1 or 2 balls in the guide behind the wheels, it could help to turn the machine opening more to the air (the same position when you carry the machine during transport with the handle) till the ball(s) roll to the back of the guide and are easier to remove. Also with only 1 or 2 balls in the guide, you can stand behind the machine and you point the shooting hole to above so the balls inside the box roll to the back of the guide and the shooting wheels then are free to turn again. Starting the machine (when pointing to above) will start the wheels turning and then you could turn the machine again in a normal position and the balls then will be shot (because the wheels have speed again to shoot then).

The reason for a ball falling down could be that a ball is in the ball hopper while transporting the machine to the court. If the ball is very close to the hole, it might fall down when moving the machine over stones or rough land.

Using machine

The machine has a lot of features and can be exactly set for the level of the player. Some players say the machine is very difficult to use and others find it very useful that they can set the machine exactly as they want. Some common misunderstandings and using the machine in a better way, are described here.
fastballsmall

The machine is shooting too fast for all trainings

During the development of the Padelshooter, there were some small hardware changes. One of these changes was that newer models shoot with a higher speeds than earlier versions. Because of this, in the app you could set a value for the Maximum Speed of the machine (1-250). The settings in the app for the speed are all percentages from 0-100 and is a % of this Maximum Speed. So, if the speed for all trainings is too fast, you could change this Maximum Speed (for example from 90 to 60). Then a speed in a training of 100% means it is the highest possible speed from "Max Speed" 60 (and not 90 anymore). This could also be used when there is wind on an outside court. When the wind is in front of the machine, the balls are shot slower because of the wind and these land not as deep as normally. Then, changing the speed (for example from 90 to 120) will help to let bounce the balls at the same location as normally (without wind).
manyballssmall

Balls were shot too fast behind each other

For the Trainings screen and the Programs screen, the Frequency setting could be changed lower or higher for all balls. For example when you play "Random" balls and you have not enough time to hit the next ball(s), set the Frequency (slider or above type the number manually) lower. For trainings with a specific high ball (Bandeja - Volley), often the volley is at the right frequency but for the high ball (Bandeja) you need more time before the next volley will be shot. For an extra pause after high balls, you can set an extra pause ONLY after the high ball (this extra pause is not after the volleys). Go to the Config screen and change the "Pause Level" (and save by "Write for Single" or "Write for Doubles"). The "Pause Level" adds an extra pause only after the high ball from 0 (no extra pause) to 100 (2 secs extra pause). This "Pause Level" is used in the trainings with Bandeja/Volley and Cross trainings, but not in de 2-line Bandeja/Volley because this is mainly used for 2 players and so no pause is needed.
ballsinnetsmall

Some balls are shot in the net

Some trainings vary the height and also you could set all trainings with different speeds. If the speed is very low, the ball won't go over the net anymore, the speed is too low. Even though, the speed migh be right for the player. Then you can set the "Net" position in the Config screen for every training. The Net position is a minimal height and, for that training, the machine won't shoot lower than this net position. So, if you lower the speed, which is the right speed for you, and then the/some balls were shot into the net then, set the "Net" position higher (for example, when the net position in the training is 20, set to 25 or 30). Remember that the ball will NEVER be shot below the "Net" position, even when the "Height" is set to a lower position! This Net position is also very useful in trainings where the height varies. If, for example, in a Random training the lowest balls were shot into the net, set the Net position higher. The lowest balls then won't be shot lower than this net position. Also when you want to train bandeja's but not always at the same height (for example between height 70 and 100), you can get use the "Random" training with a Net position set at 70 and a height of 100. Then the balls will be shot randomly between height 70 and 100, you can also set the "Width" position to als vary the horizontal position of the random balls. Also in Bandeja - Volley trainings, the Net position is very useful to set the height of the volleys. The machine will shoot high and low balls. The bandeja will be shot at the "height" position and the volleys will be shot at the Net position.

Shopping Basket